Webflow is a powerful platform that lets designers build no-code websites with browser-based visual editing. Webflow automatically generates HTML, CSS, and JavaScript; all you have to do is simply drag and drop from the options.
Just like Webflow simplifies website building, Abun simplifies content creation for blogs. Abun is an AI tool that generates SEO-optimized articles for your blogs and publishes them to your website. It allows you to automate the tedious job of content writing and publishing by preparing a content plan based on your industry and target audience.
Let’s see how to integrate Webflow website with Abun and generate 100’s of SEO-optimized articles with ease.
Steps to Integrate Webflow Website:
Assuming you have created your account and connected your website but are yet to complete the integration process, you can follow the below steps, and if you haven’t created and connected your website, check out our blog on how to do it.
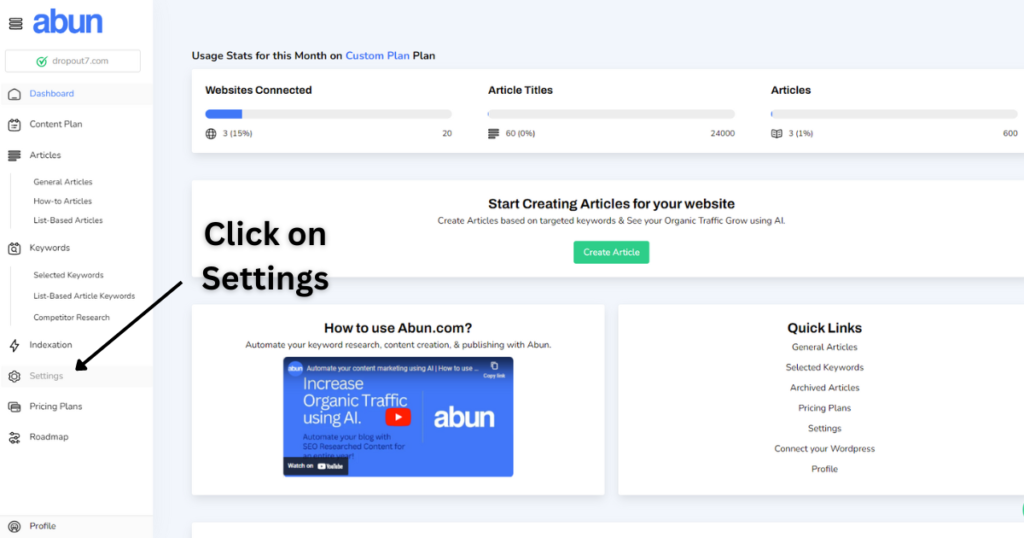
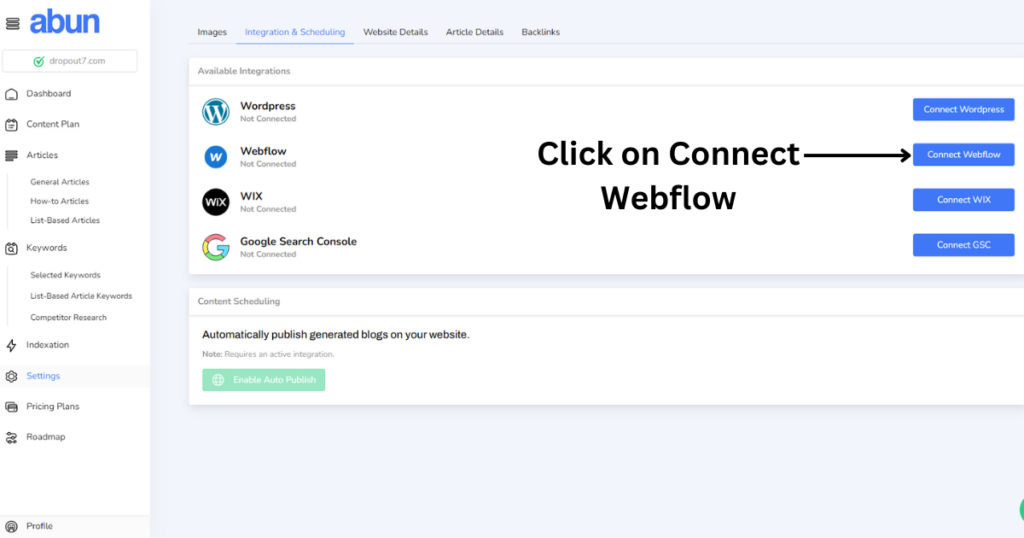
Step 1: Log in to your Abun account and click on Settings.
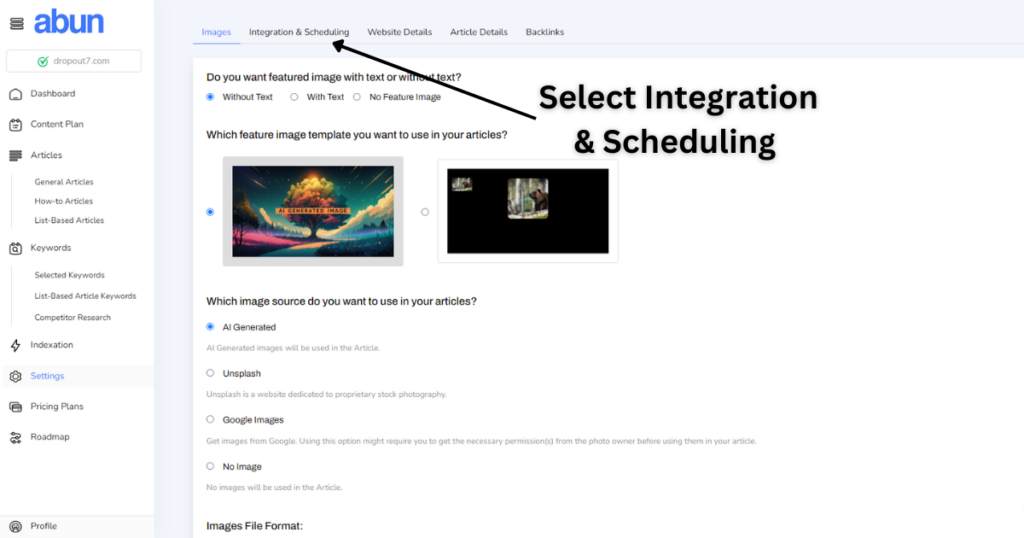
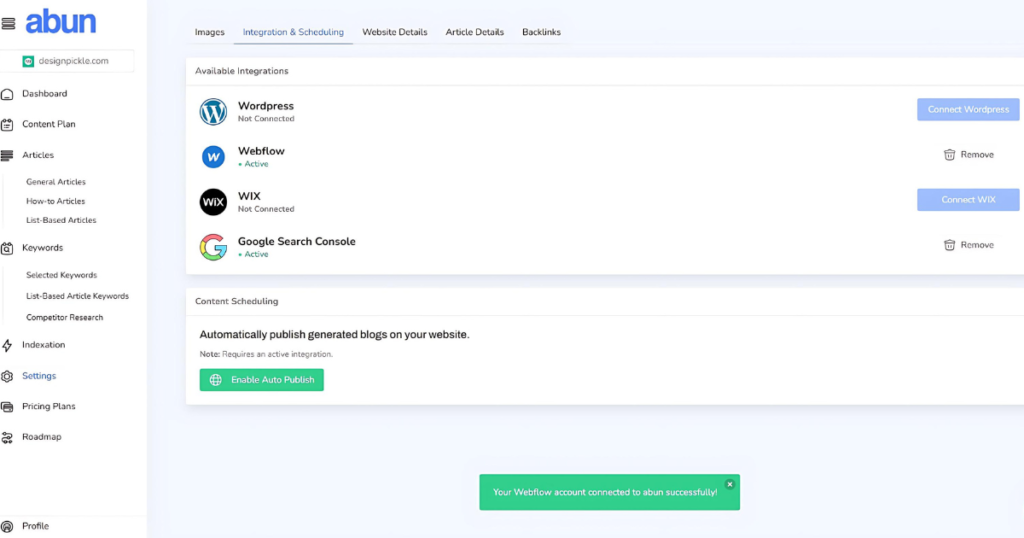
Step 2: In settings, navigate to integration and scheduling.
Step 3: Click on the “Connect Webflow” option.
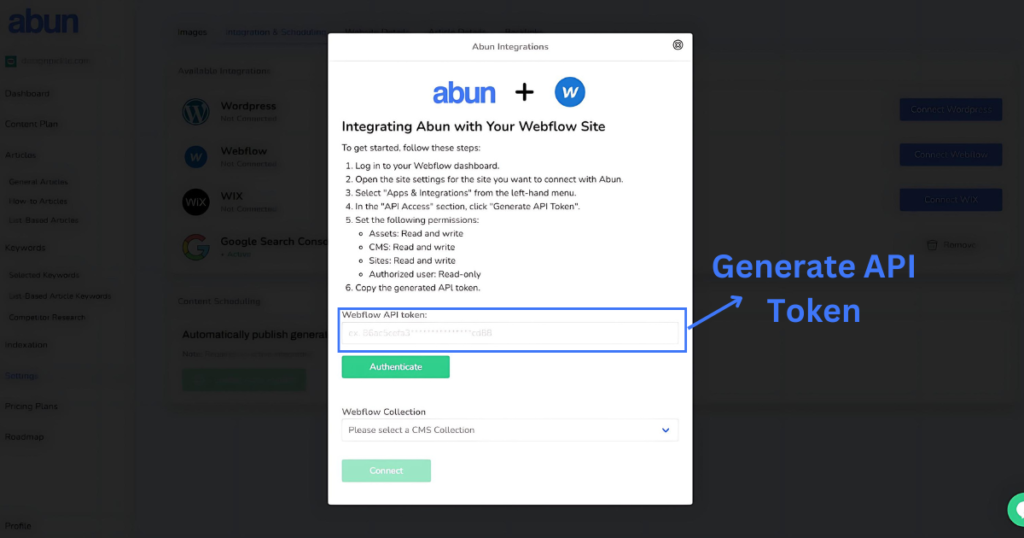
Note: In order to complete the integration process, we need to generate a Webflow API token. To do so, follow the steps below.
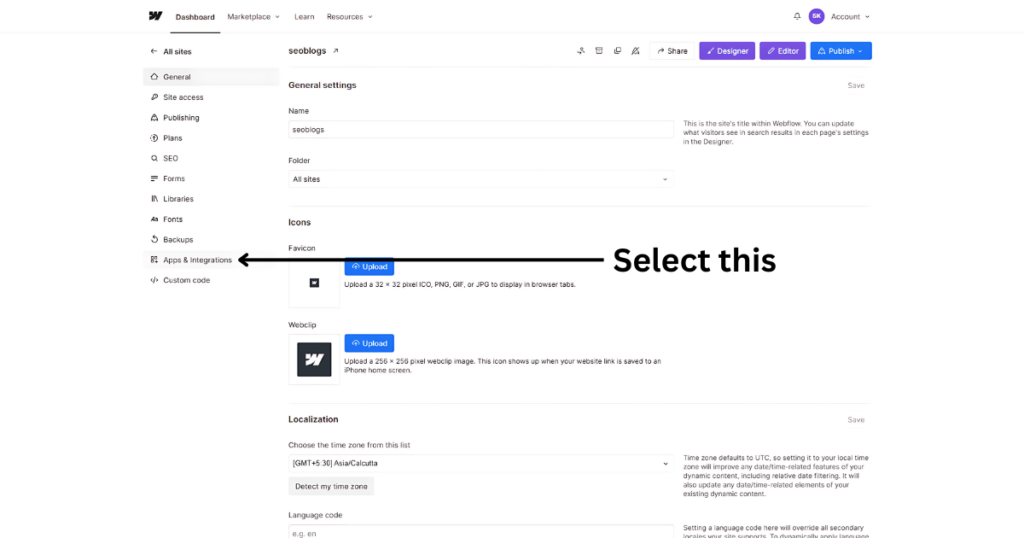
Step 4: Open your Webflow dashboard, click on all sites, and select the settings option for the website that you wish to connect with Abun.

Step 5: On the left-hand side column, select “Apps & Integrations”.
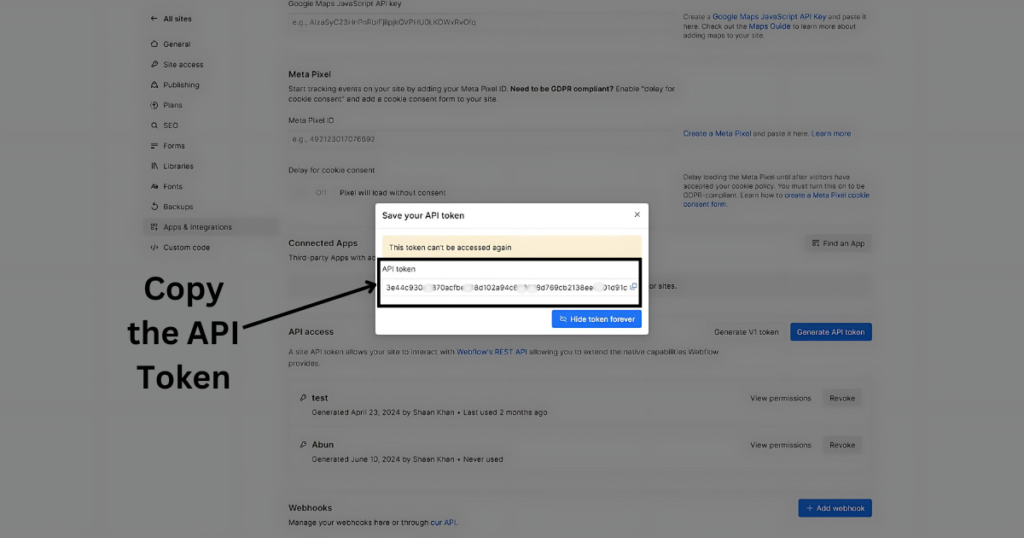
Step 6: Scroll down to the “API Access” section & click on “Generate API Token”.

Step 7: Name the token and set the following permissions:
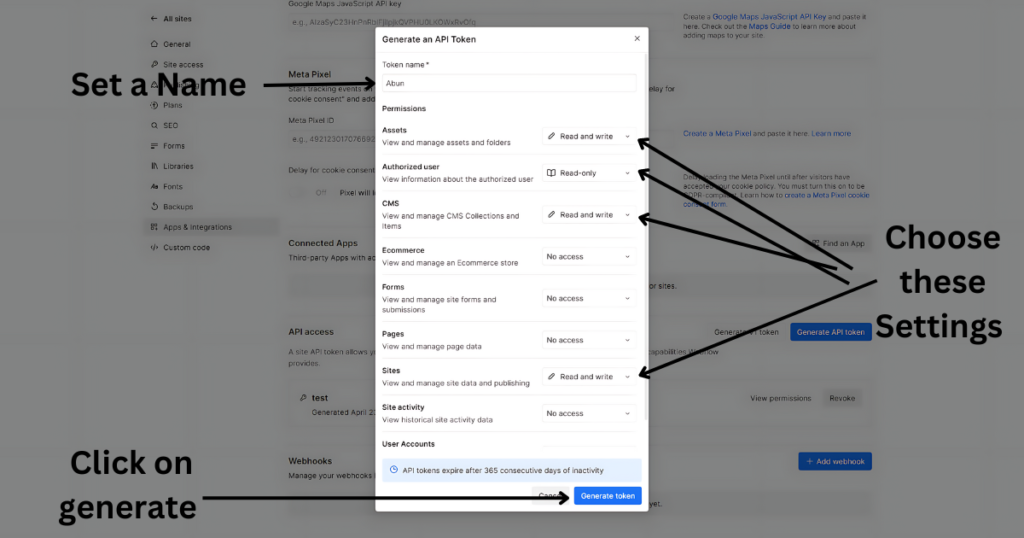
Assets: Read and write
CMS: Read and write
Sites: Read and write
Authorized user: Read-only
Click on Generate API Token.
Note: Copy and paste the API Token somewhere safe before pasting it on Abun.
Step 8: Paste the API Token in the dialog box on Abun and click on “Authenticate”. Once the authentication is complete, you can move on to selecting “Webflow Collection”.
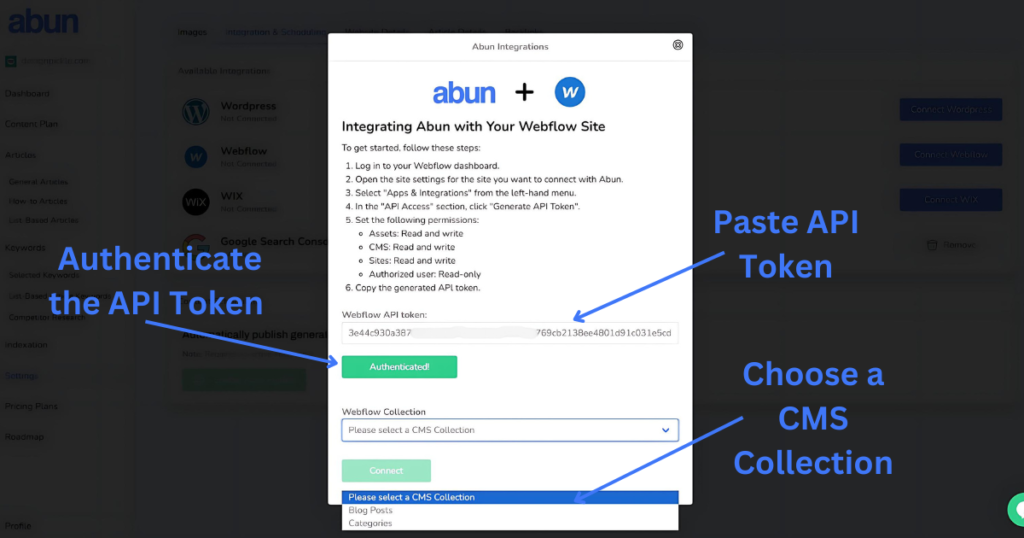
Step 9: After selecting the Webflow collection, you will have to complete the CMS mapping for which you can refer to the image below.

Step 10: Your website will be connected once the CMS mapping is done properly
With the help of above ten steps, you will be able to add your Webflow website and connect it with Abun. You can start generating articles that are SEO-optimized with relevant internal/external links, featured images, and more. Boost your organic traffic and bring in more visitors to your website with Abun.
If you still have any doubts or confusion, you can refer to this short video as well.
Abun is not limited to Webflow only, as you can connect your WIX and WordPress websites as well.